Sunday, July 7, 2013

Booting into a Graphical Environment

Booting into a Graphical Environment

If you have installed the X Window System but are not seeing a graphical desktop environment once you log into your Red Hat Enterprise Linux system, you can start the X Window System graphical interface using the command startx.
Once you enter this command and press Enter, the graphical desktop environment is displayed.
Note, however, that this is just a one-time fix and does not change the log in process for future log ins.
To set up your system so that you can log in at a graphical login screen, you must edit one file, /etc/inittab, by changing just one number in the runlevel section. When you are finished, reboot the computer. The next time you log in, you are presented with a graphical login prompt.
Open a shell prompt. If you are in your user account, become root by typing the su command.
Now, type gedit /etc/inittab to edit the file with gedit. The file /etc/inittab opens. Within the first screen, a section of the file which looks like the following appears:
# Default runlevel. The runlevels used by RHS are: 
#   0 - halt (Do NOT set initdefault to this) 
#   1 - Single user mode 
#   2 - Multiuser, without NFS (The same as 3, if you do not have networking) 
#   3 - Full multiuser mode 
#   4 - unused 
#   5 - X11 
#   6 - reboot (Do NOT set initdefault to this) 
#  id:3:initdefault:
To change from a console to a graphical login, you should change the number in the line id:3:initdefault: from a 3 to a 5.

Warning

Change only the number of the default runlevel from 3 to 5.
Your changed line should look like the following:
  id:5:initdefault: 
When you are satisfied with your change, save and exit the file using the Ctrl-Q keys. A window appears and asks if you would like to save the changes. Click Save.
The next time you log in after rebooting your system, you are presented with a graphical login prompt.

Sunday, June 23, 2013

Installing Apache2 With PHP5 And MySQL Support On CentOS 6.1 (LAMP)

LAMP is short for Linux, Apache, MySQL, PHP. This tutorial shows how you can install an Apache2 webserver on a CentOS 6.1 server with PHP5 support (mod_php) and MySQL support.
I do not issue any guarantee that this will work for you!

1 Preliminary Note

In this tutorial I use the hostname server1.example.com with the IP address 192.168.0.100. These settings might differ for you, so you have to replace them where appropriate.

2 Installing MySQL 5

To install MySQL, we do this:
yum install mysql mysql-server
Then we create the system startup links for MySQL (so that MySQL starts automatically whenever the system boots) and start the MySQL server:
chkconfig --levels 235 mysqld on
/etc/init.d/mysqld start
Set passwords for the MySQL root account:
mysql_secure_installation
[root@server1 ~]# mysql_secure_installation


NOTE: RUNNING ALL PARTS OF THIS SCRIPT IS RECOMMENDED FOR ALL MySQL
      SERVERS IN PRODUCTION USE!  PLEASE READ EACH STEP CAREFULLY!


In order to log into MySQL to secure it, we'll need the current
password for the root user.  If you've just installed MySQL, and
you haven't set the root password yet, the password will be blank,
so you should just press enter here.

Enter current password for root (enter for none):
OK, successfully used password, moving on...

Setting the root password ensures that nobody can log into the MySQL
root user without the proper authorisation.

Set root password? [Y/n]
 <-- nbsp="" span="">
New password: <-- nbsp="" span="" yourrootsqlpassword="">
Re-enter new password: <-- nbsp="" span="" yourrootsqlpassword="">
Password updated successfully!
Reloading privilege tables..
 ... Success!


By default, a MySQL installation has an anonymous user, allowing anyone
to log into MySQL without having to have a user account created for
them.  This is intended only for testing, and to make the installation
go a bit smoother.  You should remove them before moving into a
production environment.

Remove anonymous users? [Y/n]
 <-- nbsp="" span="">
 ... Success!

Normally, root should only be allowed to connect from 'localhost'.  This
ensures that someone cannot guess at the root password from the network.

Disallow root login remotely? [Y/n]
 <-- nbsp="" span="">
 ... Success!

By default, MySQL comes with a database named 'test' that anyone can
access.  This is also intended only for testing, and should be removed
before moving into a production environment.

Remove test database and access to it? [Y/n]
 <-- nbsp="" span="">
 - Dropping test database...
 ... Success!
 - Removing privileges on test database...
 ... Success!

Reloading the privilege tables will ensure that all changes made so far
will take effect immediately.

Reload privilege tables now? [Y/n]
 <-- nbsp="" span="">
 ... Success!

Cleaning up...


All done!  If you've completed all of the above steps, your MySQL
installation should now be secure.

Thanks for using MySQL!


[root@server1 ~]#


3 Installing Apache2

Apache2 is available as a CentOS package, therefore we can install it like this:
yum install httpd
Now configure your system to start Apache at boot time...
chkconfig --levels 235 httpd on
... and start Apache:
/etc/init.d/httpd start
Now direct your browser to http://192.168.0.100, and you should see the Apache2 placeholder page:

Apache's default document root is /var/www/html on CentOS, and the configuration file is /etc/httpd/conf/httpd.conf. Additional configurations are stored in the /etc/httpd/conf.d/ directory.

4 Installing PHP5

We can install PHP5 and the Apache PHP5 module as follows:
yum install php
We must restart Apache afterwards:
/etc/init.d/httpd restart
 

5 Testing PHP5 / Getting Details About Your PHP5 Installation

The document root of the default web site is /var/www/html. We will now create a small PHP file (info.php) in that directory and call it in a browser. The file will display lots of useful details about our PHP installation, such as the installed PHP version.
vi /var/www/html/info.php

Now we call that file in a browser (e.g. http://192.168.0.100/info.php):

As you see, PHP5 is working, and it's working through the Apache 2.0 Handler, as shown in the Server API line. If you scroll further down, you will see all modules that are already enabled in PHP5. MySQL is not listed there which means we don't have MySQL support in PHP5 yet.

6 Getting MySQL Support In PHP5

To get MySQL support in PHP, we can install the php-mysql package. It's a good idea to install some other PHP5 modules as well as you might need them for your applications. You can search for available PHP5 modules like this:
yum search php
Pick the ones you need and install them like this:
yum install php-mysql php-gd php-imap php-ldap php-mbstring php-odbc php-pear php-xml php-xmlrpc
Now restart Apache2:
/etc/init.d/httpd restart
Now reload http://192.168.0.100/info.php in your browser and scroll down to the modules section again. You should now find lots of new modules there, including the MySQL module:


7 phpMyAdmin

phpMyAdmin is a web interface through which you can manage your MySQL databases.
First we enable the RPMforge repository on our CentOS system as phpMyAdmin is not available in the official CentOS 6.1 repositories:
Import the RPMforge GPG key:
rpm --import http://dag.wieers.com/rpm/packages/RPM-GPG-KEY.dag.txt
On x86_64 systems:
yum install http://pkgs.repoforge.org/rpmforge-release/rpmforge-release-0.5.2-2.el6.rf.x86_64.rpm
On i386 systems:
yum install http://pkgs.repoforge.org/rpmforge-release/rpmforge-release-0.5.2-2.el6.rf.i686.rpm
phpMyAdmin can now be installed as follows:
yum install phpmyadmin
Now we configure phpMyAdmin. We change the Apache configuration so that phpMyAdmin allows connections not just from localhost (by commenting out the stanza):
vi /etc/httpd/conf.d/phpmyadmin.conf
#
#  Web application to manage MySQL
#

#
#  Order Deny,Allow
#  Deny from all
#  Allow from 127.0.0.1
#

Alias /phpmyadmin /usr/share/phpmyadmin
Alias /phpMyAdmin /usr/share/phpmyadmin
Alias /mysqladmin /usr/share/phpmyadmin
Next we change the authentication in phpMyAdmin from cookie to http:
vi /usr/share/phpmyadmin/config.inc.php
[...]
/* Authentication type */
$cfg['Servers'][$i]['auth_type'] = 'http';
[...]
Restart Apache:
/etc/init.d/httpd restart
Afterwards, you can access phpMyAdmin under http://192.168.0.100/phpmyadmin/:


8 Links

php.ini settings

PHP

PHP is a widely-used general-purpose scripting language that is especially suited for Web development and can be embedded into HTML.  For more information on PHP, visit their website at www.php.net.

Version

This documentation was written for PHP 5.1.6 but may be usefull with other versions.

How to install PHP

  1. Run the yum install command
    yum install php

How to configure PHP

  1. Increase PHP script memory limit
    In the /etc/php.ini file replace memory_limit = 16M with memory_limit = 128M
  2. Increase PHP script max execution time
    In the /etc/php.ini file replace max_execution_time = 30 with max_execution_time = 120
  3. Increase PHP script max upload size
    In the /etc/php.ini file replace max_upload_size = 2M with max_upload_size = 50M
    In the /etc/php.ini file replace post_max_size = 8M with post_max_size = 50M
  4. Create the /usr/share/phpinfo folder
    mkdir /usr/share/phpinfo
  5. Create the /usr/share/phpinfo/index.php file with the following text:
      phpinfo();
    ?>
  6. Change permissions on the index.php file
    chmod 0755 /usr/share/phpinfo/index.php
  7. Create the /etc/httpd/conf.d/phpinfo.conf file with the following text:
    # phpinfo - PHP utility function for displaying php configuration
    #
    # Allows only localhost by default

    Alias /phpinfo /usr/share/phpinfo

       order deny,allow
       deny from all
       allow from 127.0.0.1
  8. Restart Apache Server
    service httpd restart

Test

Visit localhost/phpinfo in your web browser. You should see the infamous phpinfo output. If the address bar changes to somthing other than http://localhost/phpinfo/, than somthing went wrong while following the instructions and your browser has interpreted this as a search. Try following the instruction again. If it still doesn't work, send me an email via my contact page and let me know somthing isn't working right. If it did work, you have successfully installed PHP.

MySQL Change root Password

ow do I change MySQL root password under Linux, FreeBSD, OpenBSD and UNIX-like like operating system over the ssh session?

Setting up MySQL password is one of the essential tasks. By default, root user is MySQL admin account user. Please note that the Linux or UNIX root account for your operating system and MySQL root user accounts are different. They are separate, and nothing to do with each other. Sometime you may remove Mysql root account and setup admin user as super user for security purpose.
Tutorial details
DifficultyIntermediate (rss)
Root privilegesNo
Requirementsmysqladmin/mysql
Estimated completion time5 minutes

Method #1: Use mysqladmin command to change root password

If you have never set a root password for MySQL server, the server does not require a password at all for connecting as root. To setup root password for first time, use mysqladmin command at shell prompt as follows:
$ mysqladmin -u root password NEWPASSWORD
However, if you want to change (or update) a root password, then you need to use the following command:
$ mysqladmin -u root -p'oldpassword' password newpass
For example, If the old password is abc, you can set the new password to 123456, enter:
$ mysqladmin -u root -p'abc' password '123456'
Note:123456 password is used for demonstration purpose only. You must select a strong password. It is an important protection to help you have safer MySQL database transactions.

Sample live session from my home server using mysqladmin

Fig.01: mysqladmin command in action

How do I verify that the new password is working or not?

Use the following mysql command:
mysql -u root -p'123456' db-name-here
OR
mysql -u root -p'123456' -e 'show databases;'

A note about changing MySQL password for other users

To change a normal user password you need to type the following command. In this example, change the password for nixcraft mysql user:
$ mysqladmin -u nixcraft -p'old-password' password new-password

Method #2: Changing MySQL root user password using mysql command

This is an another method. MySQL stores username and passwords in user table inside MySQL database. You can directly update or change the password using the following method for user called nixcraft:

Login to mysql server, type the following command at shell prompt:
$ mysql -u root -p

Use mysql database (type command at mysql> prompt):

mysql> use mysql;

Change password for user nixcraft, enter:

mysql> update user set password=PASSWORD("NEWPASSWORD") where User='nixcraft';

Finally, reload the privileges:

mysql> flush privileges;
mysql> quit

Sample live session from my home server

Fig.02: Changing mysql password for nixcraft user using sql commands.

This method is also useful with PHP, Python, or Perl scripting APIs.
See also:

ANOTHERVersion


This documentation was written for MySQL 5.0.45 but may be usefull with other versions.

How to install MySQL

  1. Install MySQL
    yum install mysql-server mysql php-mysql

How to configure MySQL

  1. Set the MySQL service to start on boot
    chkconfig --levels 235 mysqld on
  2. Start the MySQL service
    service mysqld start
  3. Log into MySQL
    mysql -u root
  4. Set the root user password for all local domains
    SET PASSWORD FOR 'root'@'localhost' = PASSWORD('new-password');
    SET PASSWORD FOR 'root'@'localhost.localdomain' = PASSWORD('new-password');
    SET PASSWORD FOR 'root'@'127.0.0.1' = PASSWORD('new-password');
  5. Drop the Any user
    DROP USER ''@'localhost';DROP USER ''@'localhost.localdomain';
  6. Exit MySQL
    exit

Add GNOME to a CentOS Minimal Install

Introduction

In most instances, the Linux servers I setup are used to host the Oracle database software and only require using the Command-Line Interface (CLI) for the OS. This is beneficial because I only need to perform a minimal installation and can add only those required Linux packages (RPMs) needed to support the database. However, there are situations where I need to access a graphical desktop in order to install or run certain Graphical User Interface (GUI) applications.
This guide provides the steps needed to add the GNOME Desktop to a CentOS minimal installation where the OS was installed without the X Window System.

CentOS 6

In this section, the GNOME desktop will be added to a new server running CentOS 6.2 (x86_64) after performing a "Minimal" install.

Install Desktop Packages

# yum -y groupinstall "Desktop" "Desktop Platform" "X Window System" "Fonts"
You can also install the following optional GUI packages.
# yum -y groupinstall "Graphical Administration Tools"

# yum -y groupinstall "Internet Browser"

# yum -y groupinstall "General Purpose Desktop"

# yum -y groupinstall "Office Suite and Productivity"

# yum -y groupinstall "Graphics Creation Tools"
Finally, if you wanted to add the K Desktop Environment (KDE).
# yum -y groupinstall kde-desktop
When using yum groupinstall, the groupinstall option only installs default and mandatory packages from the group. There are times when you also want to include optional packages within a group. I have not figured out (yet) how to control which package types to install (group package "policy") from the command-line using yum. The only method I know of to also include optional packages is to edit the /etc/yum.conf file and add the following to the [main] section:
group_package_types=default mandatory optional
The reason I mention this is because I wanted to install "Terminal emulator for the X Window System" (xterm) which is under the group "Legacy X Window System compatibility". xterm happens to be an optional package and did not get installed until I added group_package_types=default mandatory optional to /etc/yum.conf.
# yum -y groupinstall "Legacy X Window System compatibility"
I did find a plug-in for yum that allows users to specify which package types within a package group should be installed when using yum groupinstall.
http://projects.robinbowes.com/yum-grouppackagetypes/trac

Enable GNOME

Since the server was previously running on CLI mode, we need to change the initialization process for the machine to boot up in GUI mode.
Open /etc/inittab using a text editor and change following line:
id:3:initdefault:
To:
id:5:initdefault:
After making the change, reboot the machine.
# init 6
Note that you can switch from GUI to CLI mode manually by using following method:
GUI to CLI: Ctrl + Alt + F6
CLI to GUI: Ctrl + Alt + F1

Installing Additional Applications

After logging in to the GNOME Desktop, you can now go to System > Administration > Add/Remove Software to manage application in CentOS.
By using this wizard, you can install various applications similar to yum but through a GUI. Applications installed using this method will appear in the Application menu list.

Saturday, June 22, 2013

Ultimate guide to setting up the LAMP stack on CentOS 6 (Apache, PHP, MySQL)

This is a tutorial that covers the entire process of setting up CentOS 6 and installing/configuring Apache, PHP, MySQL, SELinux and iptables, as well as securing the server. This tutorial will give you a base setup for running static as well as dynamic web sites using PHP and MySQL. This tutorial suits VPS or other low-memory configuration as well as dedicated servers.

Prequisites
This tutorial assumes basic knowledge of shell/console usage and knowledge of one text editor.
You need to have a freshly installed CentOS 6 system to proceed. Once you’re in a root shell, start reading below!

Step 1 – Choose a text editor
Nano is very simple to use and has on-screen help at all times.
Vim is a good editor, but has a slightly steeper learning curve. Here is a good tutorial.
If you find it hard to choose, install and try them both by installing thei via Yum, the CentOS package manager!
1
yum install vim nano
Since this is your first installation using Yum you may be prompted about importing a GPG key. Enter Y followed by the Enter key to accept.
Step 2 – Configure your network
Attempt to ping an external server, such as google:
1
ping google.com -c 4
If you receive a response, skip the rest of this section as you have connectivity. If it fails, keep reading.
Not having connectivity is most often due to the lack of a DHCP server running on the network to issue an IP to your server. If that is the case, you need to configure the IP manually.
Here is a useful step-by-step tutorial for setting up static IP address on CentOS 6.
Step 3 – Update your system
After a fresh CentOS 6 install, run:
1
yum update
Select all updates and let it complete, now run:
1
cat /etc/*release*
You should see your CentOS version, at the time of writing this, that version is:
CentOS release 6.4 (Final)
Step 4 – Configure (or disable) SELinux
I usually disable SELinux as it makes for some cryptic errors when running the LAMP stack. If you would like to have a go at running SELinux enabled with LAMP, here is a good article to get you started.
To disable SELinux:
1
vim /etc/selinux/config
Change the SELINUX= line to disabled, like so:
1
SELINUX=disabled
Now reboot your machine
1
shutdown -r now
Step 5 – Add the EPEL repo
EPEL is an extra software repository with a lot of useful software that is not in the base repo. We will need it later, so let’s add it to our CentOS install! Go to this page to get the most up to date EPEL version. Copy the link from the text epel-release-6-x.noarch and use it in the command below:
1
rpm -Uvh http://download.fedoraproject.org/pub/epel/6/x86_64/epel-release-6-X.noarch.rpm
Depending on the version of CentOS installed, you might need to change x86_64 to i386 in the URL to the repo.

Step 6 – Install Apache, MySQL and PHP

Issue the command:
1
yum install mysql mysql-server mysql-devel httpd php-common php-gd php-mcrypt php-pear php-pecl-memcache php-mysql php-xml php php-mcrypt php-mbstring php-devel gcc pcre-devel
Enable Apache and MySQL on startup

1
2
chkconfig httpd on
chkconfig mysqld on
Start Apache and MySQL
1
2
service httpd start
service mysqld start
After starting mysqld, you will receive a prompt to change your MySQL root user password. The dialogue will read…

PLEASE REMEMBER TO SET A PASSWORD FOR THE MySQL root USER !
To do so, start the server, then issue the following commands:

Two commands will be presented to you, run them both. You will need to use your server name in the second command, as the help prompt instructs you. The base commands are:
1
2
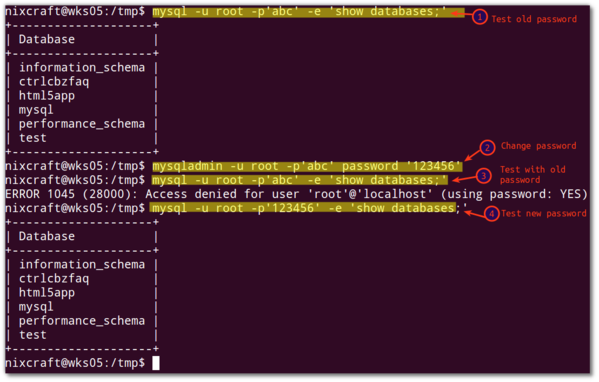
/usr/bin/mysqladmin -u root password 'new-password'
/usr/bin/mysqladmin -u root -h your-hostname password 'new-password'
Your web server should now be reachable via http://; in a web browser. If you have started Apache but the server is not visible, you probably need to configure iptables.
Step 7 – Configure iptables
Load up the iptables config file
1
vim /etc/sysconfig/iptables
Below the :OUTPUT ACCEPT [0:0] line, add
1
-A INPUT -m state --state NEW -p tcp --dport 80 -j ACCEPT
If you are going to be changing your SSH port (see separate section below), now is a suitable step to allow connections to the new SSH port.
If we are changing SSH to port 4711, this line should also be added:
1
-A INPUT -m state --state NEW -m tcp -p tcp --dport 4711 -j ACCEPT
Step 8 – Change SSH port
Changing your SSH port makes it harder for hackers to find information about your server via port scanning. To change the port (in our case to 4711), open the sshd config file:
1
vim /etc/ssh/sshd_config
Search for the line “#Port 22″, change it to:
1
Port 4711
(Note the removal of the hash sign.)
Make sure you have added the iptables rules for your new port! (See section above.)
Restart sshd by issuing:
1
service sshd restart
If you are currently on a SSH console, log out and log back on to your server using the new port.
Step 9 – Install extra “nice-to-have” packages if desired
This section is optional, go to Step 10 to continue if you don’t want any extra packages.
htop
Good replacement for top.
1
yum install htop
curl and wget
Simplifies file retrieval from the command line. You should install at least one of these. They are often included in your CentOS installation.
1
yum install curl wget
unzip
This package allows you to unzip files
1
yum install unzip
man
Manuals for commands. Sometimes not included in minimal installations.
1
yum install man
Step 10 – Reboot!
Now is a great time to reboot, issue the command
1
shutdown -r now
If your server is not accessible with SSH/HTTP after reboot, there might be something amiss with the iptables settings.
Step 11 – Install phpmyadmin
phpMyAdmin is a powerful tool for manipulating MySQL databases, let’s install it!
1
2
3
4
5
cd /var/www/html
wget http://downloads.sourceforge.net/project/phpmyadmin/phpMyAdmin/4.0.1/phpMyAdmin-4.0.1-english.zip?r=http%3A%2F%2Fwww.phpmyadmin.net%2Fhome_page%2Fdownloads.php&ts=1369351562&use_mirror=heanet
unzip phpMyAdmin-3.5.6-english.zip
mv phpMyAdmin-3.5.6-english phpmyadmin
rm -f phpMyAdmin-3.5.6-english.zip
Now you can browse to:
http:///phpmyadmin
Add blowfish_secret for security
1
2
3
cd phpmyadmin
cp config.sample.inc.php config.inc.php
vim config.inc.php
Add a secret key to $cfg['blowfish_secret'] so it looks like below:
1
$cfg['blowfish_secret'] = 'your-secret-key';
According to this site, your password may contain up to 46 characters.
It’s also a good idea to protect phpMyAdmin behind another layer, HTTP authentication.
You can find out how to do that in this excellent tutorial.
Step 12 – Add extra users
1
2
useradd username
passwd username
Allow your new user to sudo
sudo allows a user to temporarily take on the role as root.
1
vim /etc/sudoers
Note: If you are getting a blank text file (not found) in this step, install sudo with
yum install sudo

Find the line:
1
root    ALL=(ALL)       ALL
Under this line, add a new one to allow your newly created user to use sudo:
1
username ALL=(ALL)       ALL
Save the file (it’s read-only, so you need to force the write using :wq! in Vim)

Step 13 – Configure Apache

Let’s make some sane modifications to the Apache configuration to improve default behaviour and lower the memory consumption. I am configuring this for a 512MB server, if you have more memory you may retain these values at their original settings or adjust them differently.
1
vim /etc/httpd/conf/httpd.conf
Allow for .htaccess overrides
Search for the AllowOverride directive in the configuration file.
Change the instances of:
1
AllowOverride None
to
1
AllowOverride All
You will also need to uncomment the general AllowOverride declaration by removing the hashtag (#) in front of it.
Before (commented out):
1
# AllowOverride All
After (Correct version):
1
AllowOverride All
Change the amount of workers spawned
Find the IfModule prefork.c directive and change according to the example below.
1
2
3
4
5
6
7
8
 StartServers       8
 MinSpareServers    5
 MaxSpareServers   20
 ServerLimit      256
 MaxClients       256
 MaxRequestsPerChild  4000
</IfModule>
This reduces the memory footprint of Apache, in exchange for slower responses under heavy load.
Enabling KeepAlive
Change the KeepAlive directive from Off to On.
Warning:
Enabling KeepAlive improves the speed at which pages load, but may make your server crash under heavy load. See this blog post for some interesting etails.
Step 14 – Configure PHP
Let’s edit the PHP configuration file:
1
vim /etc/php.ini
Increase the maximum upload file size
I like to set this pretty high, as you can limit the upload filesize in a PHP script should you need it.
1
upload_max_filesize = 128M
You will also need to change the post_max_size restriction:
1
post_max_size = 128M
Increase the memory limit of PHP

This limit controls the maximum amount of memory a single script is allowed to use. The default (128M) is sensible, but you can increase it if you have a good amount of memory.
1
memory_limit = 256M
Increase the maximum execution and input time
The default maximum script execution time is a measly 30 seconds. You can easily bump this to 300 seconds.
1
max_execution_time = 300
The default maximum time to wait for POST and GET data is 60 seconds. File uploads are counted into this, so it is desirable to increase this to avoid errors when uploading large files.
1
max_input_time = 300
Enable the short_open_tag directive, to support shorthand syntax such as . Here’s how to enable it:
1
short_open_tag = On
Now we can restart httpd and the changes will be active
1
service httpd restart
Install opcode cache
Speed up your PHP applications by installing the Alternative PHP Cache (APC).
First we need to install some dependencies, then we will compile APC using PECL.
1
2
3
yum install make
pecl channel-update pecl.php.net
pecl install apc-3.1.13
Press enter multiple times when prompted to select options (this will pick the defaults.).
Add the APC extension to the PHP configuration:
1
vim /etc/php.ini
Under the line [PHP] add:
1
extension=apc.so
Adjust size of cache:
1
vim /etc/php.d/apc.ini
We are setting the cache to use 256MB:
1
apc.shm_size=256M
(The file apc.ini does not exist at this point, simply write your changes and APC will pick up on it.)
Restart Apache and we’re done!
1
service httpd restart
Optional: APC comes with a small web-based control panel. It’s included in the installation but you need to copy it to your web root to use it:
1
cp /usr/share/pear/apc.php /var/www/html
Now you can navigate to /apc.php on your server to see the cache stats.
Step 15 – Configure MySQL
Save your default password for mysqldump
To run mysqldump in a cron job (read more about cron jobs in Step 17), you need to set a username and password to the MySQL configuration file.
Add the following lines at the bottom of the file:
1
2
3
[mysqldump]
 user = mysql-user
 password = your-password
It is not advisable to use the root user here, instead, you may use an account with global read privileges.
(Optional) Disable InnoDB
If you want to use save memory (about 60-100 MB) and don’t need InnoDB tables, you may disable them by editing the MySQL configuration file.
1
vim /etc/my.cnf
Under the [mysqld] directive, add the following line:
1
skip-innodb
Step 16 – Add virtual hosts to Apache
Virtual hosts allow multiple web sites to be served from a single Apache installation.
The virtual hosts can be added to the end of the Apache configuration file.
Here is an example configuration with two web hosts:
1
2
3
4
5
6
7
8
9
10
11
12
NameVirtualHost *:80
ServerName your-default-site.com
DocumentRoot "/var/www/html"
</VirtualHost>
Servername your-second-site.com
ServerAlias www.your-second-site.com
DocumentRoot "/var/www/html/your-second-site.com"
</VirtualHost>
Step 17 – Set up cron jobs
Setting up cron jobs is useful for scheduling tasks. For this we’re going to install CRON and Crontab.
1
2
yum install crontabs
chkconfig crond on
To see the local user crontab issue:
1
crontab -e
Here is a great resource for learning how to manipulate the crontab file.
Warning
Remember that the scheduled commands are run as the user whos crontab they are in. For cron jobs that require elevated privileges, using the root crontab or changing file permissions may be necessary.
Setting up a cron job to backup all mysql databases
First start editing the crontab:
1
crontab -e
Now add a new line, which will run our command:
1
0 0 * * * mysqldump --all-databases > /root/sqldump.sql
This simple command will back up all databases to the file /root/sqldump.sql at midnight every day.
Note: This requires you to set a [mysqldump] user, as advised in Step 15.
You’re done!
Congratulations on setting up CentOS 6 with LAMP. The section below contains useful commands and other tweaks you can perform.
Test disk speed
Disk speed indicative of performance, different tests test different things, different on virtual environments (such as OpenVZ and KVM) and dedi, some tests might be better for some of them.
1
dd if=/dev/zero of=test bs=64k count=16k conv=fdatasync
How to judge your result (note that this is only accurate for the exact test above)
  • 0-25 MB/s -> Garbage
  • 25-70 MB/s -> Acceptable
  • 70-120 MB/s -> Good
  • >120 MB/s -> Excellent
Miscellaneous: Quick reference of useful commands

Check disk usage
1
df -h
Disable or enable iptables
1
chkconfig iptables on/off
Dump all your MySQL databases to a file (suitable for backup, in crontab or similar)
In Step 15 we saved our MySQL username and password in the MySQL configuration file /etc/my.cnf
Now we can use mysqldump without a password. To dump all databases into a file, issue:
1
mysqldump --all-databases > /root/sqldump.sql
Listing services that automatically run at startup, and their runlevels
1
chkconfig --list
Miscellaneous: Setting appropriate file permissions for PHP sites

We’d like for Apache to have as little access to the files it serves as possible. This limits the effects PHP and Apache exploits.
To accomplish this, let’s run an example with a fictional site residing in the folder:
1
/var/www/html/yoursite
To secure this site we are going to put up the following restrictions:
  • Files can only be read
  • Directories can only be read and executed (this is required for PHP to work)
  • Apache is the owner of all files
To do this, we invoke:
1
2
3
chown -R apache:apache /var/www/html/yoursite
chmod -R 400 /var/www/html/yoursite
chmod -R a+X /var/www/html/yoursite
Feedback
That’s it for this tutorial! I appreciate any feedback you might have, so if something is unclear or can be improved, feel free to leave a comment!
Sources and additional information
http://wiki.centos.org/HowTos/Network/SecuringSSH
http://www.linuxmail.info/add-epel-centos-6/
http://romanrm.ru/en/dd-benchmark
http://www.vectorns.com/blog/19-running-xampp-on-fedora-with-selinux-enabled
http://www.cyberciti.biz/faq/rhel-fedorta-linux-iptables-firewall-configuration-tutorial/
http://www.question-defense.com/tools/phpmyadmin-blowfish-secret-generator
http://www.reallylinux.com/docs/htaccess.shtml

Vim commands for linux

< The list of Vim commands >

Working with files
Vim command Action
:e filename Open a new file. You can use the Tab key for automatic file name completion, just like at the shell command prompt.
:w filename Save changes to a file. If you don't specify a file name, Vim saves as the file name you were editing. For saving the file under a different name, specify the file name.
:q Quit Vim. If you have unsaved changes, Vim refuses to exit.
:q! Exit Vim without saving changes.
:wq Write the file and exit.
:x Almost the same as :wq, write the file and exit if you've made changes to the file. If you haven't made any changes to the file, Vim exits without writing the file.
These Vim commands and keys work both in command mode and visual mode.
Vim command Action
k or Up Arrow Move the cursor up one line.
j or Down Arrow Down one line.
h or Left Arrow Left one character.
l or Right Arrow Right one character.
e To the end of a word.
E To the end of a whitespace-delimited word.
b To the beginning of a word.
B To the beginning of a whitespace-delimited word.
0 To the beginning of a line.
^ To the first non-whitespace character of a line.
$ To the end of a line.
H To the first line of the screen.
M To the middle line of the screen.
L To the the last line of the screen.
:n Jump to line number n. For example, to jump to line 42, you'd type :42
Inserting and overwriting text
Vim command Action
i Insert before cursor.
I Insert to the start of the current line.
a Append after cursor.
A Append to the end of the current line.
o Open a new line below and insert.
O Open a new line above and insert.
C Change the rest of the current line.
r Overwrite one character. After overwriting the single character, go back to command mode.
R Enter insert mode but replace characters rather than inserting.
The ESC key Exit insert/overwrite mode and go back to command mode.
Deleting text
Vim command Action
x Delete characters under the cursor.
X Delete characters before the cursor.
dd or :d Delete the current line.
Entering visual mode
Vim command Action
v Start highlighting characters. Use the normal movement keys and commands to select text for highlighting.
V Start highlighting lines.
The ESC key Exit visual mode and return to command mode.
Editing blocks of text
Note: the Vim commands marked with (V) work in visual mode, when you've selected some text. The other commands work in the command mode, when you haven't selected any text.
Vim command Action
~ Change the case of characters. This works both in visual and command mode. In visual mode, change the case of highlighted characters. In command mode, change the case of the character uder cursor.
> (V) Shift right (indent).
< (V) Shift left (de-indent).
c (V) Change the highlighted text.
y (V) Yank the highlighted text. In Windows terms, "copy the selected text to clipboard."
d (V) Delete the highlighted text. In Windows terms, "cut the selected text to clipboard."
yy or :y or Y Yank the current line. You don't need to highlight it first.
dd or :d Delete the current line. Again, you don't need to highlight it first.
p Put the text you yanked or deleted. In Windows terms, "paste the contents of the clipboard". Put characters after the cursor. Put lines below the current line.
P Put characters before the cursor. Put lines above the current line.
Undo and redo
Vim command Action
u Undo the last action.
U Undo all the latest changes that were made to the current line.
Ctrl + r Redo.
Vim command Action
/pattern Search the file for pattern.
n Scan for next search match in the same direction.
N Scan for next search match but opposite direction.
Replace
Vim command Action
:rs/foo/bar/a Substitute foo with bar. r determines the range and a determines the arguments.
The range (r) can be
nothing Work on current line only.
number Work on the line whose number you give.
% The whole file.
Arguments (a) can be
g Replace all occurrences in the line. Without this, Vim replaces only the first occurrences in each line.
i Ignore case for the search pattern.
I Don't ignore case.
c Confirm each substitution. You can type y to substitute this match, n to skip this match, a to substitute this and all the remaining matches ("Yes to all"), and q to quit substitution.
Examples
:452s/foo/bar/ Replace the first occurrence of the word foo with bar on line number 452.
:s/foo/bar/g Replace every occurrence of the word foo with bar on current line.
:%s/foo/bar/g Replace every occurrence of the word foo with bar in the whole file.
:%s/foo/bar/gi The same as above, but ignore the case of the pattern you want to substitute. This replaces foo, FOO, Foo, and so on.
:%s/foo/bar/gc Confirm every substitution.
:%s/foo/bar/c For each line on the file, replace the first occurrence of foo with bar and confirm every substitution.

Cent os GUI ( CentOS - difference between ssh -X and startx, and starting a gui)

to install KDE type:
yum groupinstall "X Window System" "KDE (K Desktop Environment)"
If you've already got Gnome installed, it will be the default. Edit /etc/sysconfig/desktop to change this. Set:
DESKTOP="KDE"
DISPLAYMANAGER="KDE"
or use switchdesk kde to flip to KDE.

  • Run this to install Gnome:
    yum groupinstall "X Window System" "GNOME Desktop Environment"
  • Run gnome-session to start GNOME desktop environment.
  • To have the it started on boot, change the runlevel in /etc/inittab to 5.
    id:5:initdefault:

Configure static IP address on Centos 6.3 or Redhat 6.3 RHEL

1. Default network configuration on Centos or RedHat for eth0 (dhcp)
vi /etc/sysconfig/network-scripts/ifcfg-eth0DEVICE=”eth0″
BOOTPROTO=”dhcp”
HWADDR=”00:0C:29:55:52:41″
IPV6INIT=”yes”
NM_CONTROLLED=”yes”
ONBOOT=”yes”
TYPE=”Ethernet”
UUID=”67ffccb8-2408-4ecb-bdd9-baf81f4911af”
2.  Configure static IP Address
vi /etc/sysconfig/network-scripts/ifcfg-eth0DEVICE=”eth0″
BOOTPROTO=”static”
HWADDR=”00:0C:29:55:52:41″
IPV6INIT=”yes”
NM_CONTROLLED=”yes”
ONBOOT=”yes”
TYPE=”Ethernet”
IPADDR=192.168.0.112
NETMASK=255.255.255.0
UUID=”67ffccb8-2408-4ecb-bdd9-baf81f4911af”
3. Configure Default gateway and hostname
vi /etc/sysconfig/network
NETWORKING=yes
HOSTNAME=Centos6.3
GATEWAY=192.168.0.1
4. Restart network
[root@Centos6 ~]# /etc/init.d/network restart
Shutting down interface eth0: Device state: 3 (disconnected)
[ OK ]
Shutting down loopback interface: [ OK ]
Bringing up loopback interface: [ OK ]
Bringing up interface eth0: Active connection state: activating
Active connection path: /org/freedesktop/NetworkManager/ActiveConnection/4
state: activated
Connection activated
[ OK ]
[root@Centos6 ~]#
5. Configure DNS Server
[root@Centos6 ~]# cat /etc/resolv.conf
# Generated by NetworkManager
nameserver 8.8.4.4
# No nameservers found; try putting DNS servers into your
# ifcfg files in /etc/sysconfig/network-scripts like so:
#
# DNS1=xxx.xxx.xxx.xxx
# DNS2=xxx.xxx.xxx.xxx
# DOMAIN=lab.foo.com bar.foo.com
[root@Centos6 ~]#