Thursday, July 14, 2022

How to draw image from raw bytes using ReportLab?

from reportlab.lib.utils import ImageReader
import io
image = ImageReader(io.BytesIO(raw_image_bytes)) 
page.drawImage(image, ...) 


Example:

def PDF_view(request):

    response = HttpResponse(content_type='application/pdf')

    ...

    page = canvas.Canvas(response, pagesize=A4)
    page.setTitle("Sample PDF")


    image = ImageReader(io.BytesIO(raw_image_bytes))# raw_image_bytes is from external source
image.seek(0) page.drawImage(image, 100, 100 ) filename = 'document.pdf' page.showPage() page.save() return response

https://stackoverflow.com/questions/40966401/how-to-draw-image-from-raw-bytes-using-reportlab

Monday, July 4, 2022

Subversive (SVN) manual installation in eclipse

Step-1

  • Go to Eclipse
  • Click on Help
  • Click on Install New Softwares
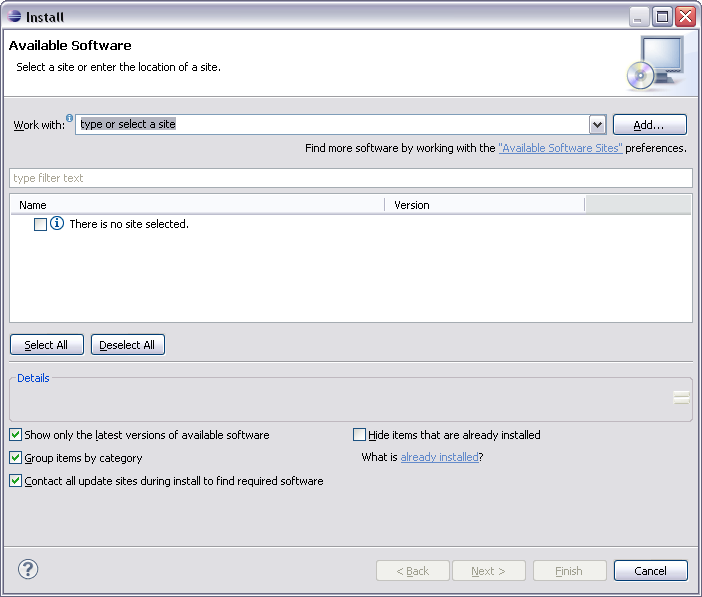
  • Click on Add Button
  • Provide Name SVN Connector
  • Add URL: http://community.polarion.com/projects/subversive/download/eclipse/6.0/update-site/
  • Click OK button

Step-2

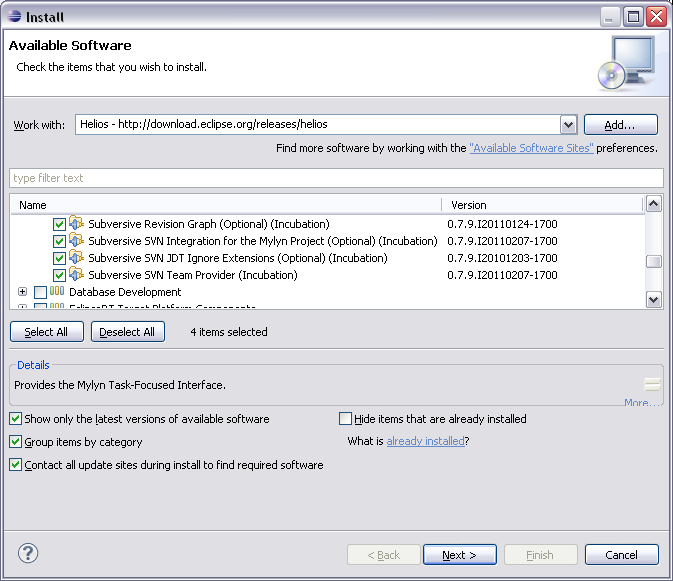
You will see two available packages for Subversive SVN Connectors. Select both and click Next.

Step-3

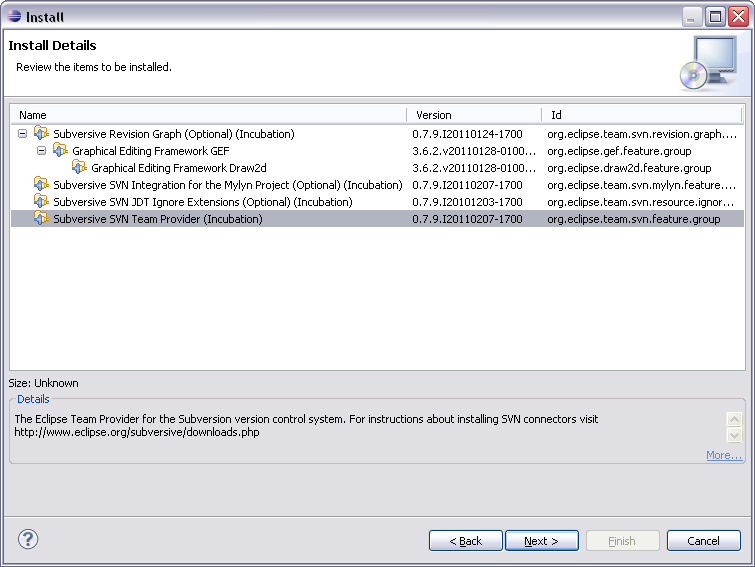
On next screen, you will see all packages which will be installed on your Eclipse IDE.

Click Next and Install packages. Once done – please restart your Eclipse.

How to verify if SVN Connector is installed correctly or not?

  • Go to Eclipse Tab
  • Click on Preferences
  • Search for SVN
  • Click on SVN Connector Tab
  • You should see SVNKit name there instead of Blank space.

Other way to verify:

Just refresh your SVN Repository and you should see all folders from SVN like tags, assets, trunk, etc will be loaded successfully.

And you are all set. Now continue following step-6 onwards from other tutorial which we mentioned above.

Subversive (SVN) installation in eclipse

Subversive installation instructions

Subversive can be simply installed from within Eclipse using update manager. All what the user should do is just point update manager to the remote or local update site. To install Subversive:

  1. Start Eclipse and select menu item 'Help > Instal New Software...'

    Software Updates

  2. Then selec common software repository or if you need to install Subversive only, you can directly add Subversive update site by pressing 'Add' button.

    Update manager

  3. On the 'Add Repository' form enter the URL to the Subversive update site. The proper URL can be found on http://www.eclipse.org/subversive/downloads.php. Also the update-site for Subversive integration plug-ins can be added in the same way.
    • Please note that the use of the software you are about to access may be subject to third party terms and conditions and you are responsible for abiding by such terms and conditions.

    Click on the 'OK' button to store update site information.

    New update site

  4. The Subversive software can be found in the common software repository in 'Collaboration Tools' section and provides following features list.
      Required feature, which should be installed unconditionally:
    • SVN Team Provider - The Eclipse Team Provider for the Subversion version control system.


    • Optional integrations with other plug-ins, which can be installed if you use these plugins and want to have them integrated with Subversive:
    • Subversive Integration for the Mylyn Project - Integration with Mylyn (http://www.eclipse.org/mylyn/).


    • Other optional features:
    • JDT Ignore Extensions - The feature is useful for Java development because it allows to interpret output folders as ignored resources automatically.
    • Revision Graph - The feature is useful for visual browsing of the SVN revisions tree.
    • SVN Team Provider Sources - The sources of the Eclipse Team Provider for Subversion.

    Select Subversive SVN Team Provider and other features if required and then follow through installation wizard steps.

    Feature Search Result

  5. The update manager calculates dependencies and offers you a list of features to install. Select the needed ones and click the 'Next >' button.

    Features to Install

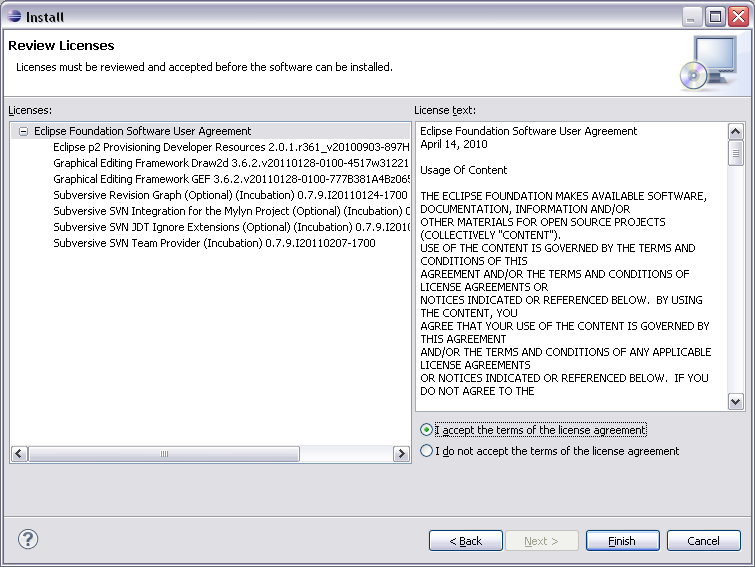
  6. Accept terms of license agreement and click the 'Finish' button in order to start the download of selected features.

    Feature License

  7. To apply installation changes and restart Eclipse click on the 'Yes' button.

    Restart dialog

  8. After Eclipse restart you'll see connectors discovery dialog which will allow you to install Subversive Connectors without registering connectors update site manually.

    Connectors discovery dialog

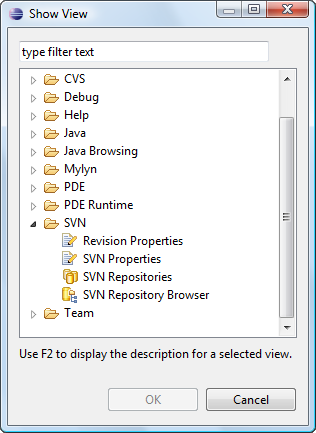
  9. You can find Subversive perspective and views in correspondent dialogs, activated by menu items 'Window > Open Perspective > Other...' and 'Window > Show View > Other...'.

    Open PerspectiveShow View

How to enable auto formatting in Eclipse

 After creating a custom code formatter in Eclipse, as discussed in my previous post How to create and share Eclipse code style formatter, it is now time to put that code formatter in action. Code formatting should be an automatic process. Following are the steps which describe how to enable auto formatting in Eclipse.

Step 1

Open Eclipse and go to Window -> Preferences

Go to Window - Preferences

Step 2

In Preferences window, go to Java -> Editor -> Save Actions

Go to Save Actions

Step 3

In the right pane of Save Actions, check the following options:

  • Perform the selected actions on save
  • Format the source code – Within this, select the radio button labelled, Format edited lines. This will prevent formatting the entire code when only a certain section of code is saved after being edited.
Enable options in save actions

Click on Apply and then OK to save the changes. Now the next time you hit save in Eclipse, your code will be automatically formatted. Pretty cool, eh?

How to attach JDK source code in Eclipse

 Often while debugging Java applications, it is required to view the source code of standard Java classes. This post describes how to attach JDK source code in Eclipse IDE.

Step 1

Open Eclipse and go to Window -> Preferences

Go to Window - Preferences

Step 2

In Preferences window, go to Java -> Installed JREs. Select the JRE and click on the Edit button.

Go to Preferences - Java - Installed JREs

In the Edit JRE window, select the file rt.jar in the section named JRE system libraries and click on Source Attachment button.

Edit JRE source location

In the Source Attachment Configuration window, provide the location of the src.zip which is usually found in the JDK root folder. For example, C:/Program Files/Java/jdk1.7.0_13/src.zip

Provide JDK source file location

Click OK -> Finish -> OK to save and apply the changes. Now in your Java program if you press CTRL + left-mouse-click on any standard Java class, for example java.lang.System, it will open up the source code for that class.

How to change user name in Eclipse code templates

 When a new code file is created, the author name in the @author is set to the value which is taken from the user.name environment variable. One way to override this value is to modify the eclipse.ini file. Following are the steps which will show you how to change user name in Eclipse code templates.

Navigate to the location of eclipse.ini file on your system (a file search will reveal its location). Add the following parameter to the list of the Virtual Machine arguments in the eclipse.ini file.

How to change user name in Eclipse code templates
eclipse.ini
-vmargs ... ... ... -Duser.name=Your name

Make sure to add this user name argument after the -vmargs command and also don't forget to restart Eclipse after making this change. After this change, wherever the ${user} variable is used, it will be replaced with the user name entered in the eclipse.ini file.

How to change user name in Eclipse code templates

How to install Java Decompiler for Eclipse

 Often there is a need to decompile third party or standard Java classes to understand their code. But there is no built-in Java decompiler for Eclipse. However there are freely available external plugins which can be installed in Eclipse to create a built-in decompilation option. Java Decompiler project is one such plugin. In this blog, I’ll list down the steps required to install the JD-Eclipse plugin.

Step 1 – Install JD-Eclipse plugin

Open Eclipse and go to the menu option Help -> Install New Software… In the Available Software window, click on the link, Available Software Sites. In the window, click on Add button. In the pop-up window, provide any name to the site and paste the update site URL as http://jd.benow.ca/jd-eclipse/update and click on OK.

Go to option Install New Software in Eclipse
Click on Available Software Sites
Click on Add to create a new software site
Add a new site for JD-Eclipse

In the Available Software window, select the newly created site from the drop down and wait. Eclipse will fetch the list of plugins available for installation.

Note
While updating Eclipse in a corporate network, a proxy authentication error might be thrown in case the proxy settings are not maintained in Eclipse. Please refer to my blog How to add proxy settings in Eclipse for solving proxy issues in Eclipse.

Proxy Authentication Error in Eclipse

Select all the packages and click Next. Accept the license agreement and click Finish to begin the installation of plugin.

Select the JD-Eclipse packages for downloading
Accept the license

Restart Eclipse after the installation is finished.

Restart Eclipse

Step 2 – Make JD-Eclipse as default class editor

In the Eclipse menu and go to Window -> Preferences

Go to Window - Preferences

In the Preferences windows, go to General -> Editors -> File Associations. In the right-pane, select .class without source as the file type. In the Associated editors: section below, click on the Add button. In the pop-up window which opens up, select Internal editors and in the list below it, select the Class File Editor and click on the OK button

Select the Class File Editor (identified by the coffee-cup icon) and click on the Default button. This makes JD-Eclipse as the default decompiler for class files without source.

Now, simply double-click on any .class file and JD-Eclipse will decompile it for you. You can also place debug points in the decompiled classes while debugging your applications.

Note
The JD-eclipse plugin can only decompile .class files that are visible from the classpath/build path.